
We research every product we recommend. We may earn a commission from the links on this page.
Tools & Home Improvement › Close To Ceiling Lights

Heat Finds the Weakest Joint First

We compare published specifications and marketplace data. We do not test these products.

LED Garage Lights Dim Unevenly Because Heat Follows the Path You Don't See
Photo by Erik Mclean on Pexels

An LED that runs 10°C hotter than its neighbor loses brightness twice as fast. In a ceiling fixture, some LEDs always run hotter — the ones farthest from the housing edge, nearest a mechanical joint, or trapped against insulation with nowhere to send their heat. That uneven thermal map is why parts of a panel or flush mount go dim while the rest stays bright, and why the fix starts with understanding where heat actually goes.

Affiliate disclosure: This article contains affiliate links. We may earn a commission if you buy through them, at no extra cost to you.

Everything we recommend
4 picks

How we picked

We did not install these fixtures. Judgements rest on published specifications, thermal design details, and owner-reported behavior.

Heat path, not brightness

A fixture’s thermal route from junction to housing matters more than its lumen number. Continuous aluminum backing beats segmented panels with air gaps between sections.

Adjustable power, not fixed draw

Selectable wattage lets you reduce heat at the source. A fixture locked to one power level gives you no lever when temperatures climb.

Mounting context, not fixture alone

Recessed into insulation or flush against drywall changes the thermal story. We read each design for where its heat can actually go.

Owner patterns, not star counts

A single buzzing report is an anecdote. Two owners describing the same thermal symptom — melting covers, early failure — names a pattern worth flagging.

Why do some LEDs in the same fixture fade faster than others?

Every LED in a ceiling fixture shares one driver and draws roughly the same current. They produce roughly the same heat. But they do not shed that heat at the same rate, and that is where the trouble starts.

An LED chip sits on a metal-core circuit board — a thin dielectric layer over an aluminum base. Heat conducts through that base into the fixture housing, then radiates or convects into the room. The path works well at the edges, where the housing acts as a continuous heat sink with air on at least one side. At the center of a large panel, heat has to travel farther through aluminum to reach an edge. At a mechanical joint — a hinge, a clip, a screw point — the thermal path narrows to whatever metal-to-metal contact the joint provides.

Aluminum conducts heat at roughly 205 watts per meter-kelvin. Still air manages about 0.025. That is an 8,000-to-1 ratio. Any air gap in the conduction path — even a fraction of a millimeter at a loose joint — acts like a wall. The LEDs on the wrong side of that wall run hotter, dim faster, and sometimes shift color toward yellow as the phosphor degrades unevenly.

Does the shape of the fixture change where heat collects?

A single continuous panel spreads heat across one unbroken aluminum surface. A multi-unit pack — six separate flush mounts, twelve separate recessed cans — isolates each fixture’s thermal zone entirely. Neither is automatically better. The panel concentrates more total wattage in one spot but gives heat a wide, uninterrupted path outward. The separate units run less power each but trap every watt inside a small, sealed housing.

The shape that causes the most trouble is the one with internal joints: folding panels, hinged segments, decorative housings with complex internal geometry between the LED board and the exterior shell. Every joint is a thermal bottleneck where conduction depends on how tightly two pieces of metal press together — a variable that changes with temperature cycling as parts expand and contract.

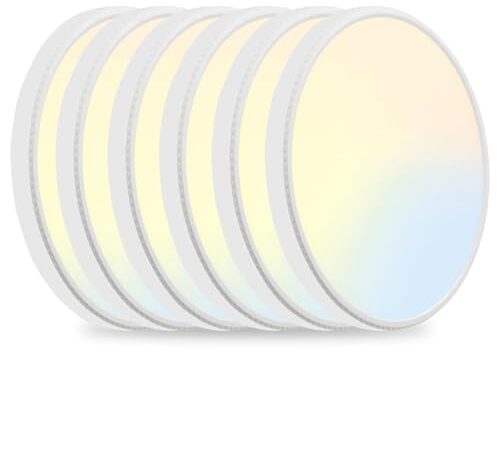
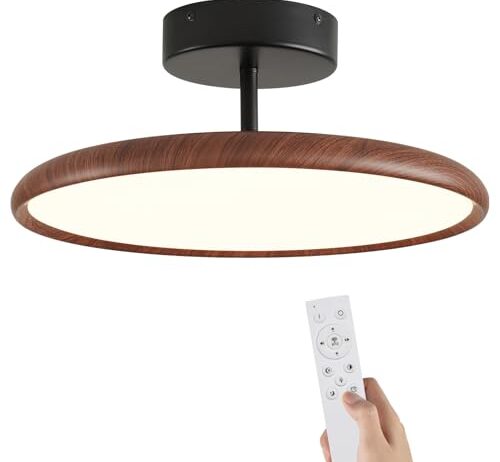
Round flush mounts like the 7.5-inch units in the MODERN 6-pack have a simple thermal story: a flat circuit board against a flat metal plate, heat radiating downward into the room. The path is short and uninterrupted. A semi-flush mount like the BlesULuk drops the fixture below the ceiling on a short stem, which adds a small air gap between the housing and the ceiling surface — that gap actually helps, because it lets air circulate around the top of the fixture instead of trapping heat against drywall.

What happens when you mount a fixture into an insulated ceiling?

Drywall is a mediocre conductor. Insulation is worse — it is literally designed to block heat transfer. A flush-mount fixture pressed flat against an insulated ceiling can only shed heat downward, into the room. The entire top surface, which would be the largest radiating area, is thermally blocked.

Recessed fixtures face this problem at its worst. A canless recessed light — the kind that integrates the LED and driver into one unit and slides directly into a ceiling cutout — sits inside the ceiling cavity surrounded by whatever insulation the builder packed in. IC-rated fixtures are designed to touch insulation safely, but safe is not the same as cool. The fixture still runs hotter than it would in open air, and hotter means shorter life.

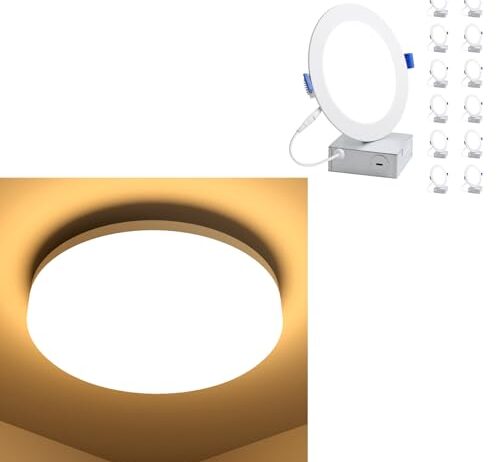
The Lepro bundle pairs a flush-mount ceiling light with twelve 4-inch canless recessed units. Those two fixture types live in different thermal worlds even when wired to the same switch. The flush mount sits against the ceiling surface with heat escaping downward. The recessed cans sit inside the ceiling, surrounded by insulation, with heat going mostly nowhere. Running both at the same wattage does not mean they age at the same rate.

Can you reduce heat by dimming?

Yes, and the physics is direct. Dimming an LED means reducing the current through the junction. Fewer electrons crossing means fewer photons out and less waste heat generated. Cut power by half and you roughly halve the heat at the source — not at some distant heat sink, but at the junction itself, where temperature matters most.

But dimming protocols are not interchangeable. A 0-10V dimmer sends a low-voltage control signal to the driver, which adjusts current smoothly. A standard residential TRIAC dimmer chops the AC waveform, which works with incandescent bulbs but can cause LED drivers to flicker, buzz, or shut off at low levels. Installing a TRIAC dimmer on a fixture designed for 0-10V control does not dim the light — it tortures it.

The Aphyni 1×4 panel specifies 0-10V dimming, which means it expects a commercial-style dimmer, not the $12 slider from the hardware store. That is a real cost beyond the fixture itself: a 0-10V dimmer and compatible wiring. The tradeoff is smooth, flicker-free control from full brightness down to near-off, with proportional heat reduction at every step.

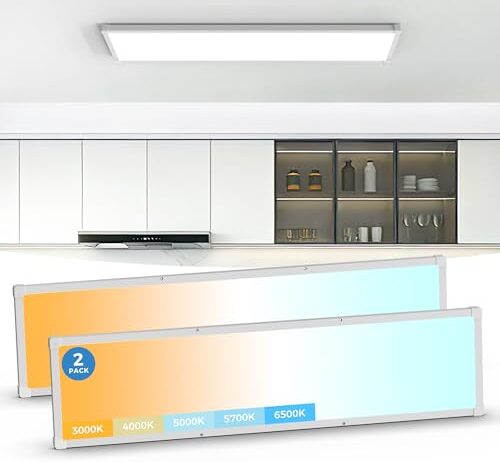
The Aphyni 1×4 panel is built for a different job than the other three fixtures here. At 6,500 lumens across a 1-by-4-foot surface, it lights a shop, a garage bay, or a commercial space where output matters and decorative appeal does not. Two panels in a 2-pack cover a two-car garage with even, shadow-free light from a surface that sits nearly flat against the ceiling.

What sets the thermal design apart is the combination of selectable wattage and continuous dimming. Choose a lower wattage setting at the DIP switch during installation, and the fixture draws less power from the start — less current through the LEDs, less heat generated, longer life at the cost of some brightness. Then dim further from the wall when full output is not needed. Each reduction works at the source, lowering junction temperature rather than managing heat after it is already produced.

The corner protection Aphyni mentions addresses a real stress point. Panel edges and corners are where thermal expansion meets mechanical constraint — the aluminum expands at a different rate than the mounting frame, and repeated heating cycles can crack solder joints at the perimeter. Reinforced corners resist that fatigue. One owner notes the light is bright enough at full power for detailed woodwork, confirming the 6,500-lumen output is real and usable at close range.

Does color temperature selection affect heat?

Not directly. Warm white (3000K) and cool white (5000K and above) LEDs produce similar waste heat per watt — the color difference comes from phosphor chemistry, not power consumption. A fixture that lets you switch between five color temperatures is not running hotter at 6000K than at 3000K.

What matters is how the switching works. Most selectable-CCT fixtures use a small toggle or DIP switch on the fixture body, set once during installation. You choose 3000K, wire it up, close the canopy, and that is the color until you pull the fixture down and flip the switch. The MODERN 6-pack offers five settings — 3000K, 3500K, 4500K, 5000K, and 6000K — but one owner reports that the included remote control only works from less than a foot away, which effectively makes it a manual switch that happens to be wireless.

The Lepro bundle takes a different approach: the color temperature is fixed per fixture type. The flush mount runs warm white at 3000K. The recessed cans run cool white at 5000K. You cannot mix temperatures within either set. That is a constraint, but it is also a simplification — no switch to set wrong, no reset on power cycling, no ambiguity about what color you are getting.

What does thermal failure actually look like?

It does not look like a burned-out bulb. LEDs rarely fail all at once. They fade — a slow, measurable decline in light output that accelerates as junction temperature stays elevated. The industry term is lumen depreciation, and it follows a predictable curve tied to operating temperature.

Before the dimming becomes visible, other symptoms show up. Buzzing is one: an owner of the BlesULuk semi-flush mount reports a persistent hum from the canopy area even without a dimmer switch, connected directly to 120V house wiring. That buzz likely comes from the driver’s transformer or inductor vibrating at line frequency — a symptom that can indicate a thermal or electrical stress the driver was not designed to handle continuously.

The more alarming failure mode shows up in the MODERN 6-pack. One owner reports that after about 45 days, the fixtures began buzzing loudly, then one unit stopped working entirely and appeared to melt the light cover. That progression — buzzing, then thermal damage to the housing — suggests the driver or LED board exceeded the temperature rating of the plastic diffuser. At $6.33 per fixture, the thermal margin between normal operation and material failure may be narrow.

The MODERN 6-pack makes sense in spaces where lights run for short stretches — a hallway you walk through, a laundry room, a closet. Thermal stress accumulates over hours, and a fixture that runs 30 minutes a day never reaches the sustained junction temperatures that cause uneven dimming over months.

The five-position CCT switch is genuinely useful when you are lighting six different rooms. A 3000K warm white for a bedroom, 5000K daylight for a utility room, something in between for a hallway — all from the same box, chosen at install. Just set the switch before you mount the bracket and wire it up.

The thermal risk at this price point is real, though. One owner describes a unit that melted its cover after 45 days, and another reports mounting brackets that do not align with standard 4-inch junction boxes, requiring modifications during install. For a primary living space fixture that runs 6-8 hours a day, the thermal headroom may not be sufficient. For a closet light that sees 20 minutes of use, the math changes entirely.

How do flush mount and recessed LEDs differ in heat buildup?

A flush mount sits on the ceiling surface. Its back presses against drywall, its face points into the room. Heat leaves through the front — radiation from the diffuser and convection off the housing edges. The top is insulated by the ceiling itself, which is a poor conductor but at least a stable one.

A recessed fixture sits inside the ceiling cavity. In older construction with open attics, that cavity might provide some air circulation. In modern insulated construction, the fixture is surrounded by material specifically engineered to prevent heat transfer. IC-rated fixtures handle this safely from a fire perspective, but the thermal penalty is real: the fixture runs hotter, the LEDs run hotter, and the lifespan shortens proportionally.

The Lepro bundle puts both types on the same receipt. Twelve flush mounts and twelve recessed cans, wired to the same circuits, running the same hours. The flush mounts will likely outlast the recessed units if the ceiling is insulated — not because of any quality difference between the two fixture types, but because the recessed cans have nowhere to put their heat.

FAQ

Do LED ceiling lights get dimmer in the middle over time?

Yes. LEDs at the center of a large panel or fixture sit farthest from the housing edges where heat escapes. They run hotter, and the Arrhenius relationship between temperature and LED degradation means a 10°C difference in junction temperature can halve lifespan. The center dims faster while the edges stay bright.

Can dimming LED lights extend their lifespan?

Directly. Dimming reduces current through the LED junction, which reduces both light output and waste heat at the source. A fixture running at 50 percent power generates roughly half the heat, keeping junction temperatures lower and slowing the degradation that causes uneven dimming over months and years.

Why do my LED ceiling lights buzz even without a dimmer?

Buzzing without a dimmer typically comes from the driver’s transformer or inductor vibrating at line frequency. It can indicate thermal stress, an undersized driver, or a resonance in the housing. If buzzing appears weeks or months after installation rather than immediately, the driver may be degrading from sustained heat exposure.

Is it safe to put LED flush mount lights in an insulated ceiling?

IC-rated fixtures are fire-safe against insulation contact. But safe does not mean cool — the insulation blocks the fixture’s primary heat escape route, raising junction temperatures and accelerating lumen depreciation. In heavily insulated ceilings, expect shorter effective lifespan from any fixture compared to the same unit in open air.

What is 0-10V dimming and do I need a special switch for it?

0-10V dimming uses a separate low-voltage signal wire to tell the LED driver how much current to deliver. It requires a compatible 0-10V dimmer and typically an extra pair of wires run to the switch location. Standard residential TRIAC dimmers are not compatible and can cause flickering or buzzing when paired with 0-10V fixtures.